
So, now that the board is functioning as it should, and it is running programs, it’s time to add some new functionality and finish it’s design so I can start testing it with the other ECB Retrobrew Computer cards I’d like to use, specifically DiskIOv3 and in the future the VDU card and the PropIOv2. The ECB2650 design is going to borrow tried and tested elements from the Retrobrew Computers SBCv2 Z80 card’s memory paging control. Whether this is a good idea for this older processor and whether it will actually get used, is another issue. But I will build it in to give it some new age flexibility, aka Retrobrew. Back in the 70’s when this CPU was developed, memory was expensive, so 2Kbyte and 4Kbyte systems were the norm. Now, we can afford to put as much RAM as we like into these systems.
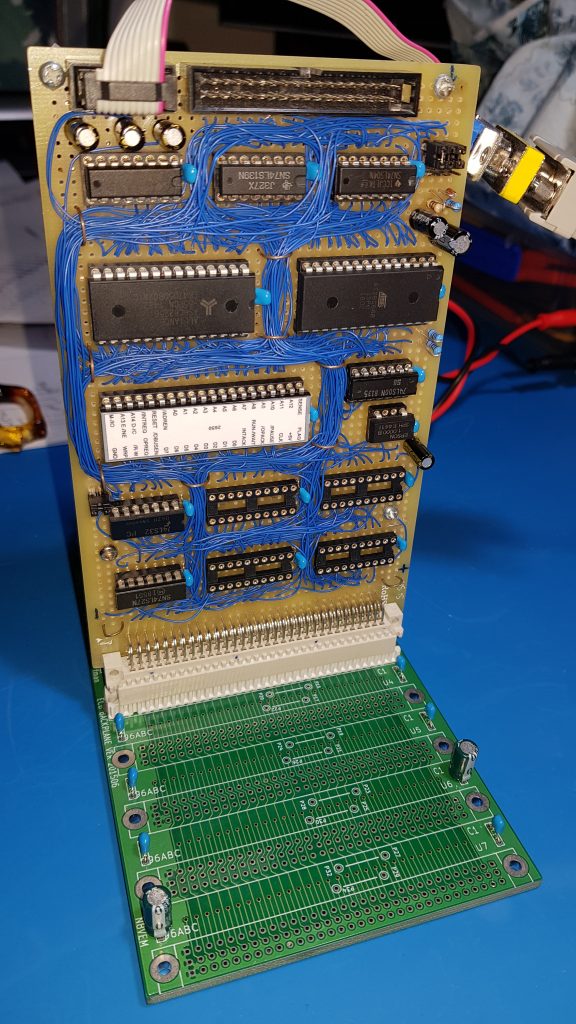
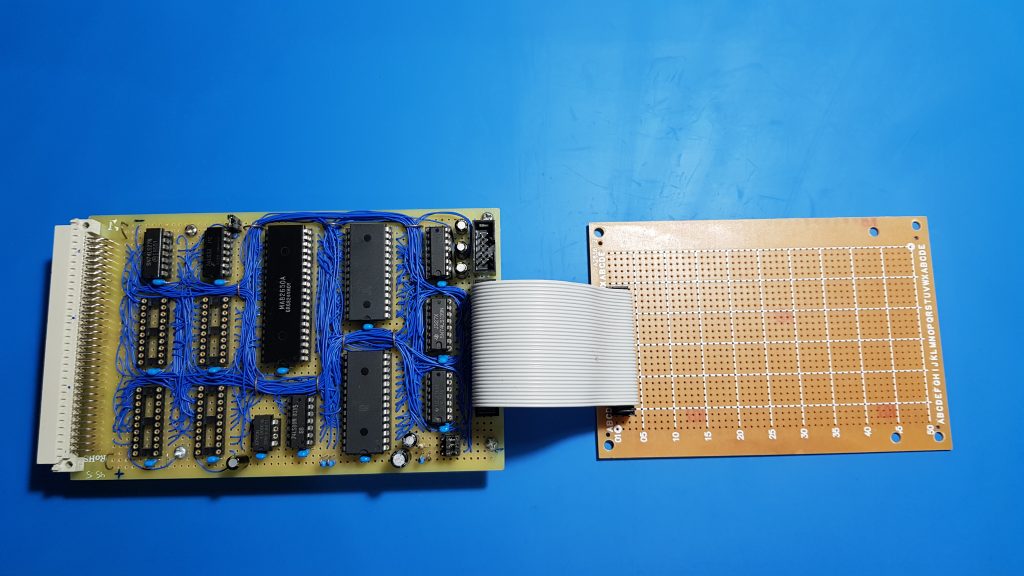
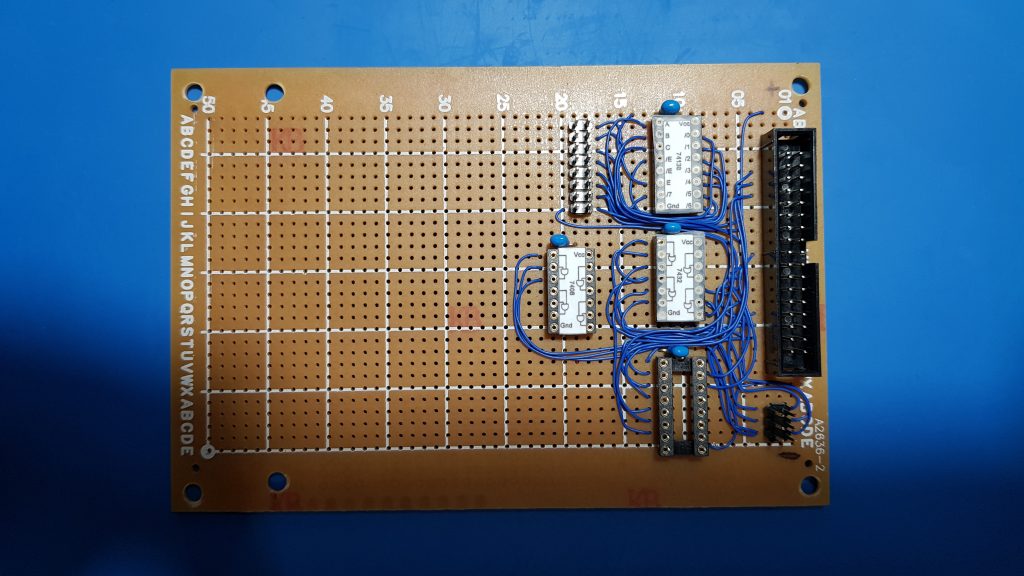
As you have seen with the current ECB2650 board, there is not a lot of room to add any more chips on this development board. So early on, with that in mind, I put a connector on the end to transfer signals to an expansion board.
A little modification of the main board with PCB stand offs, and now we can add the expansion board.
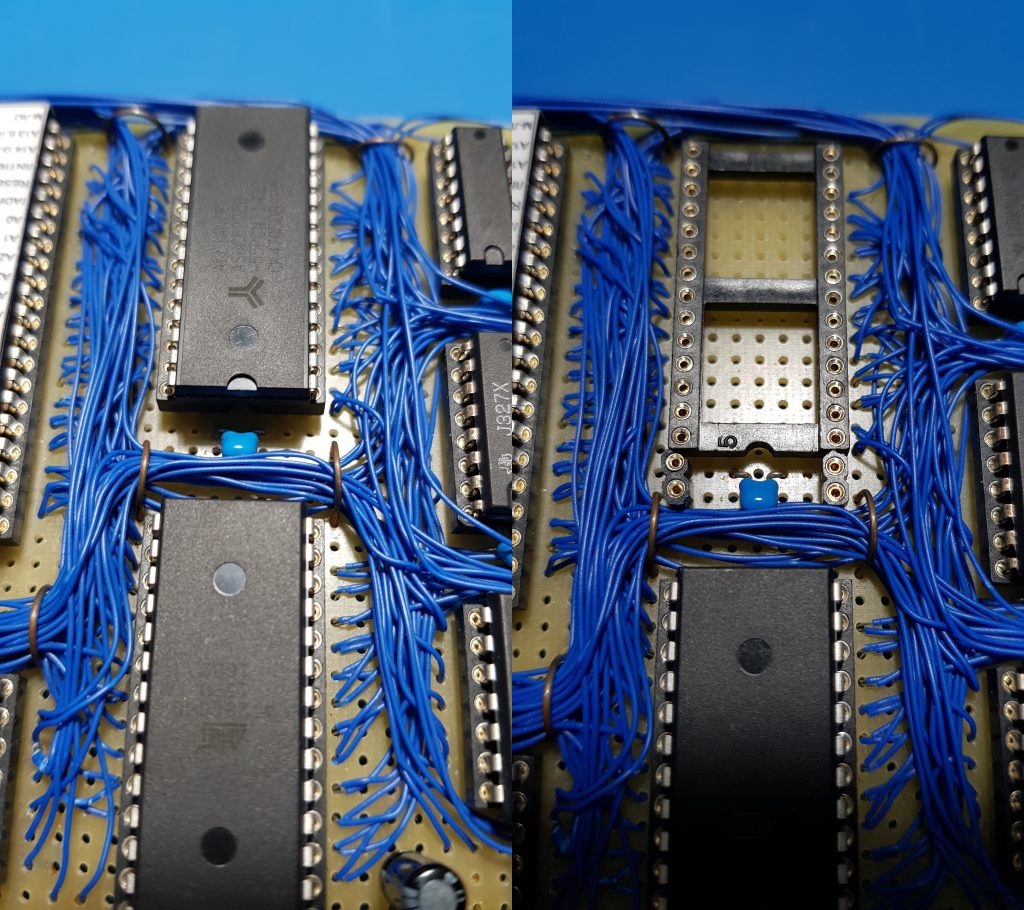
Up until this point, I have just used a 32Kbyte SRAM plugged into the RAM socket, which has served well for testing and development. So now that we have more space to add components, we can add circuitry for some RAM paging and some address decoding for any future on board I/O we might need/want in the future. This means some modification to the main board for a larger SRAM, but rather than taking the socket out of the board, which would be a major pain, I will just use machine pin strip and add to the socket.
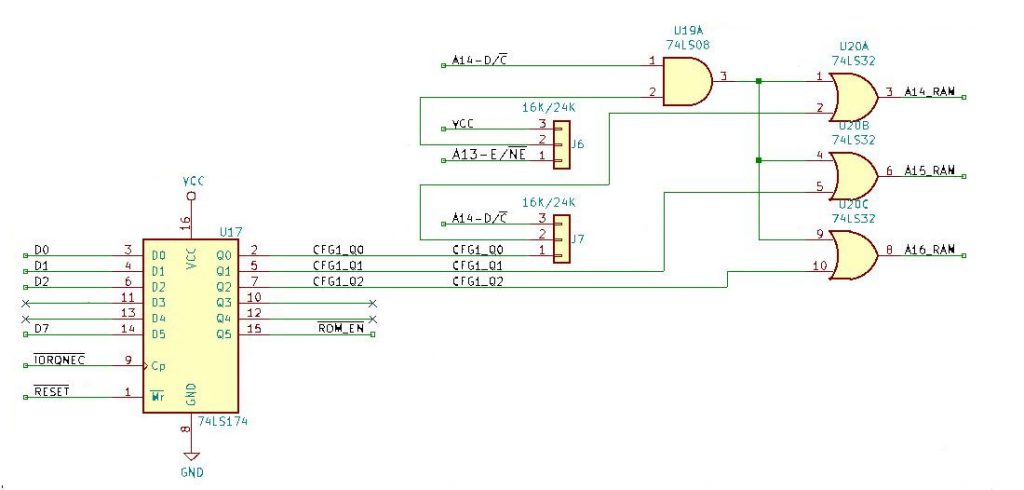
I have decided to control the RAM paging and ROM Enable signals with the Port C extended I/O capability of the CPU. Let me explain. The Signetics 2650 CPU has two forms of I/O. An Extended I/O which uses a 2 byte CPU instruction to perform I/O to 2 ports called Port C & D, and a Non-Extended I/O which provides 256 ports, similar to the Z80. Because I want to use the Non-Extended I/O to essentially look or emulate the Z80 I/O port arrangement on the ECB bus, I will use the Extended I/O of the 2650 to control some of the on board functionality. So I will use Port C for the RAM paging and ROM Enable latch circuitry.
OK, so I have tried to test this with my Excel spreadsheet, but the real test is to construct it and test it with real life commands, so lets start building.
So this is what we need to complete the additional functionality using Port C to control RAM paging and ROM Enable control. We have plenty of room to add some other ports either using the Port D with a ‘245 input buffer and a ‘374 output latch. We may also want to add a 82C55 VIA for more on board ports, but we will look at that in the future.
In Part 5 we will add some chips and see if this functionality works…